Use Webhooks to Send SMS Notifications via Zapier
Subscribe Pro Webhooks can be connected to Zapier and used to trigger a wide variety of actions and activities. We have documented an example here of how Subscribe Pro webhooks can be used to trigger SMS messages to your customers at certain points during the subscription lifecycle.
Steps
-
In Zapier, click the “Make a Zap” button at the top left of the screen.
-
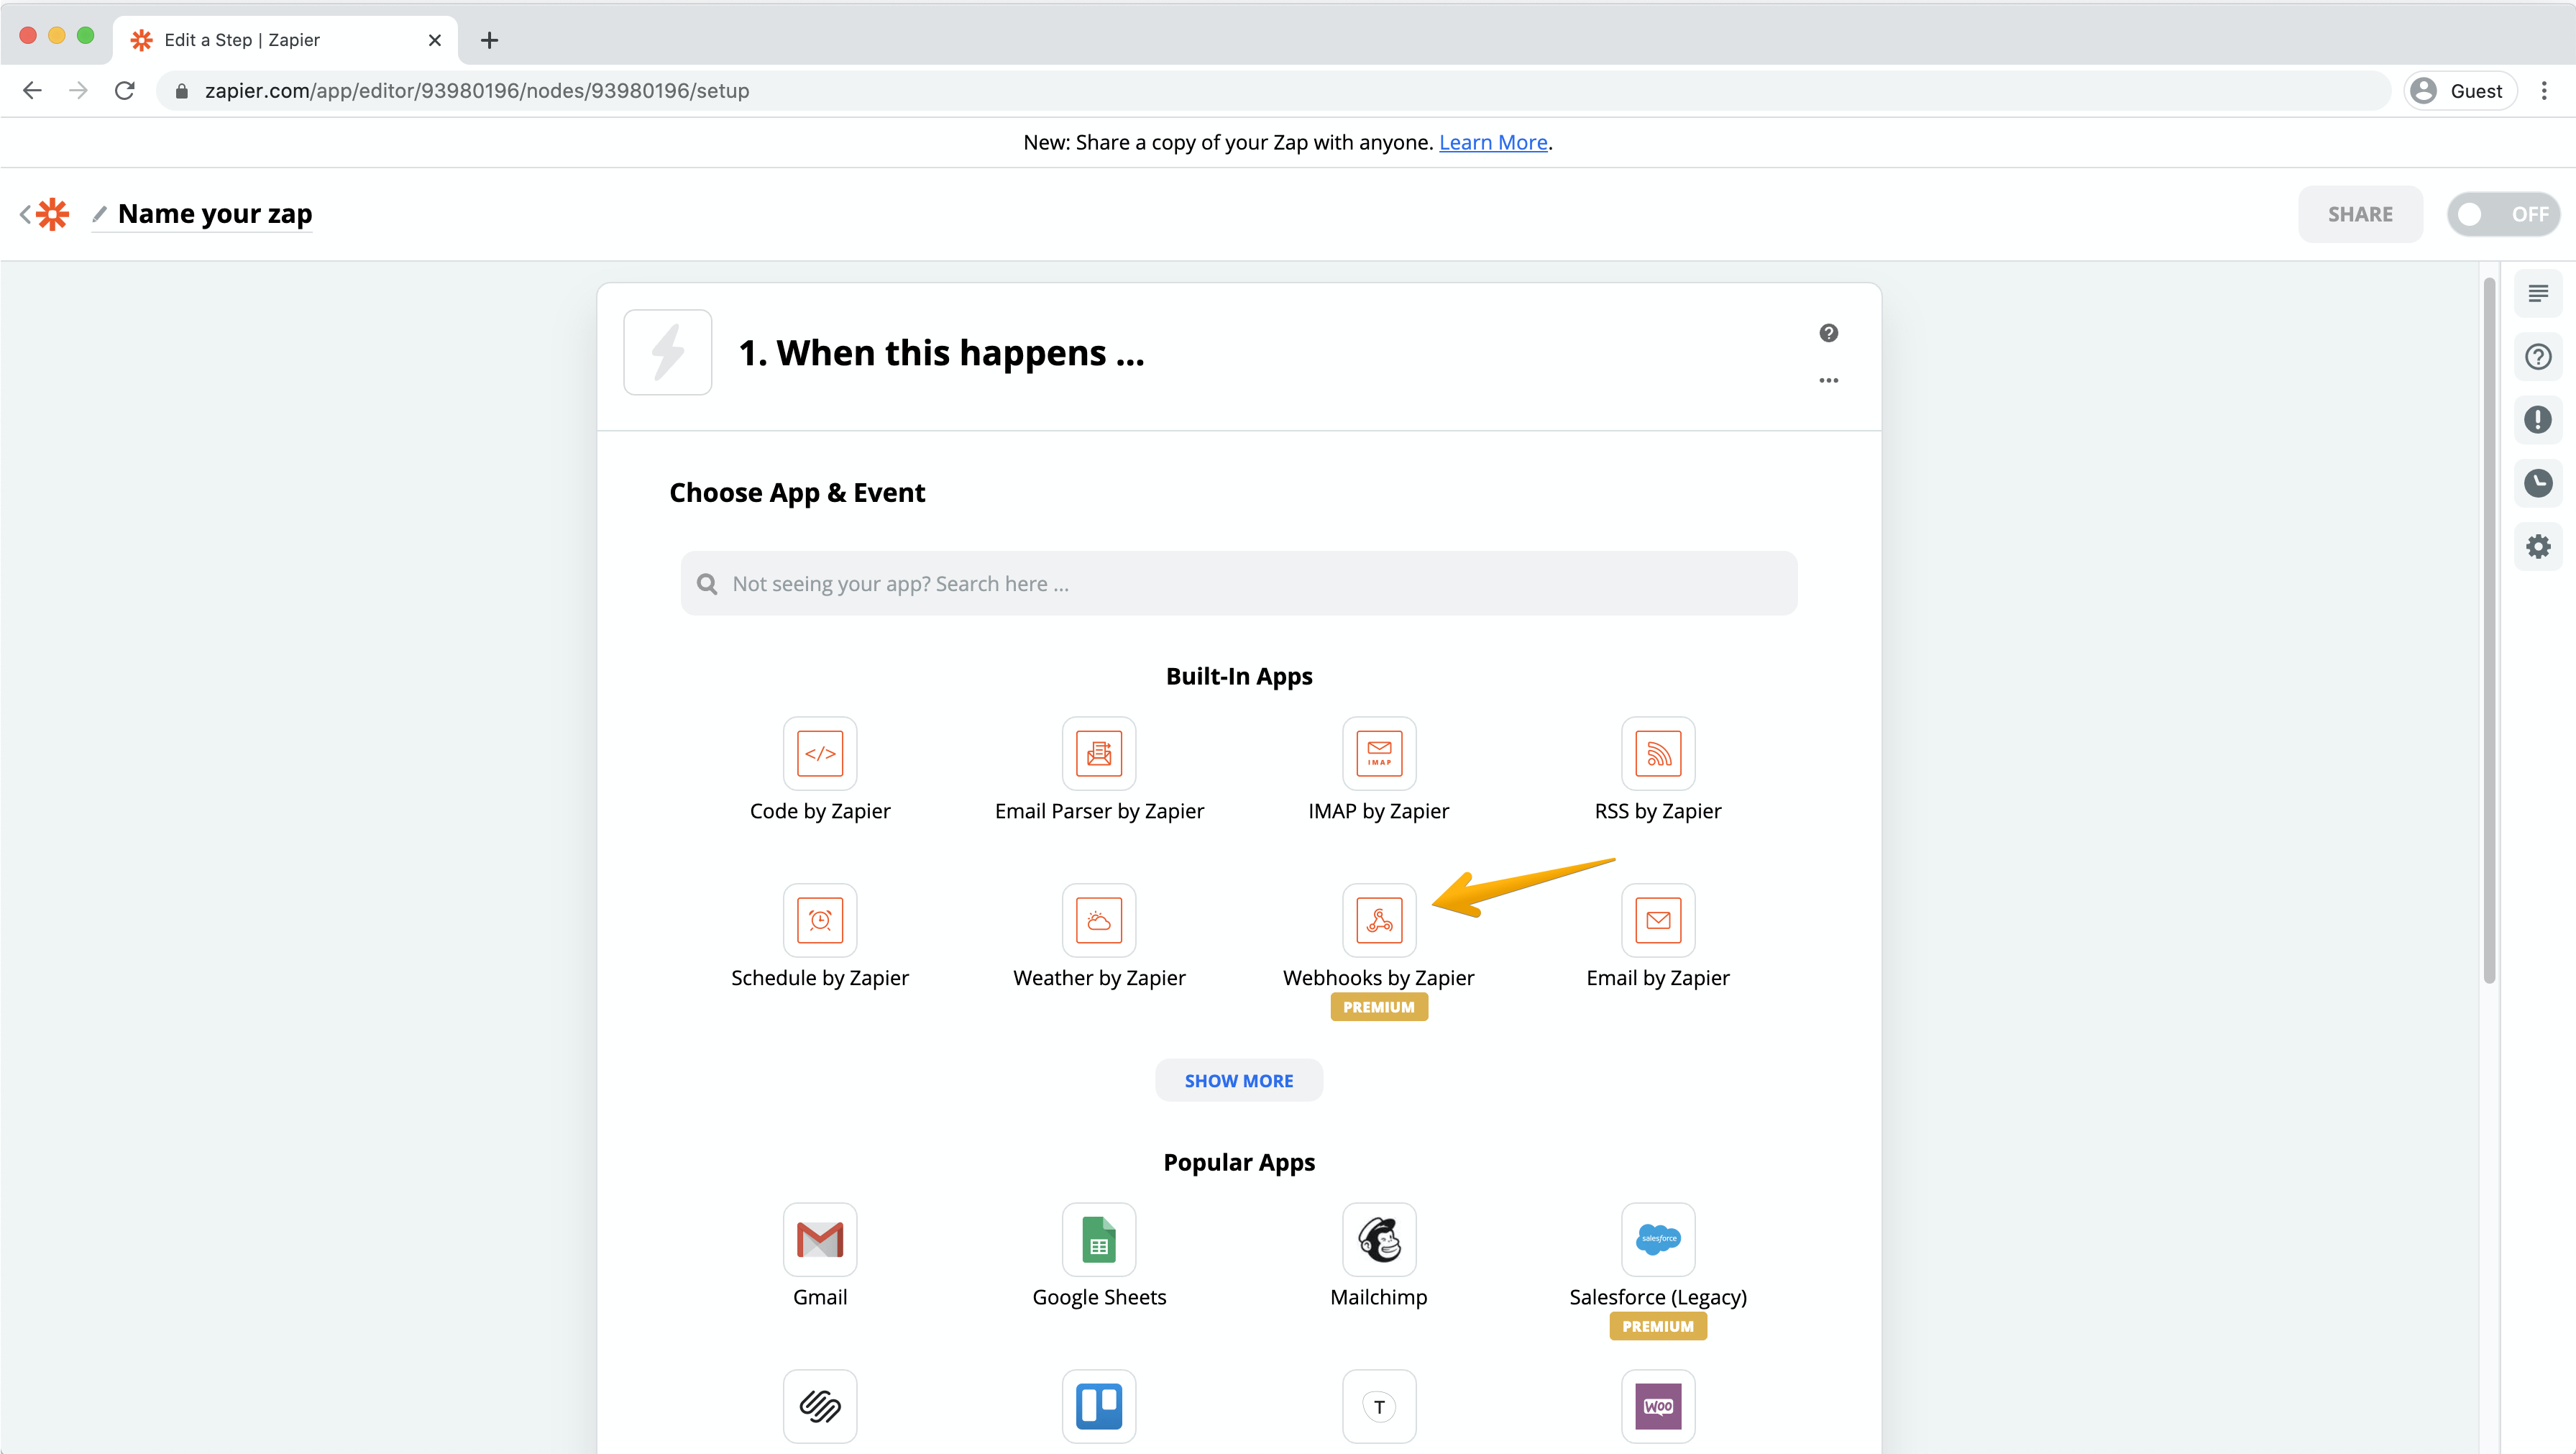
Under "When this happens…” select “Webhooks by Zapier.” (If it isn’t listed by default, use the search bar.)
-
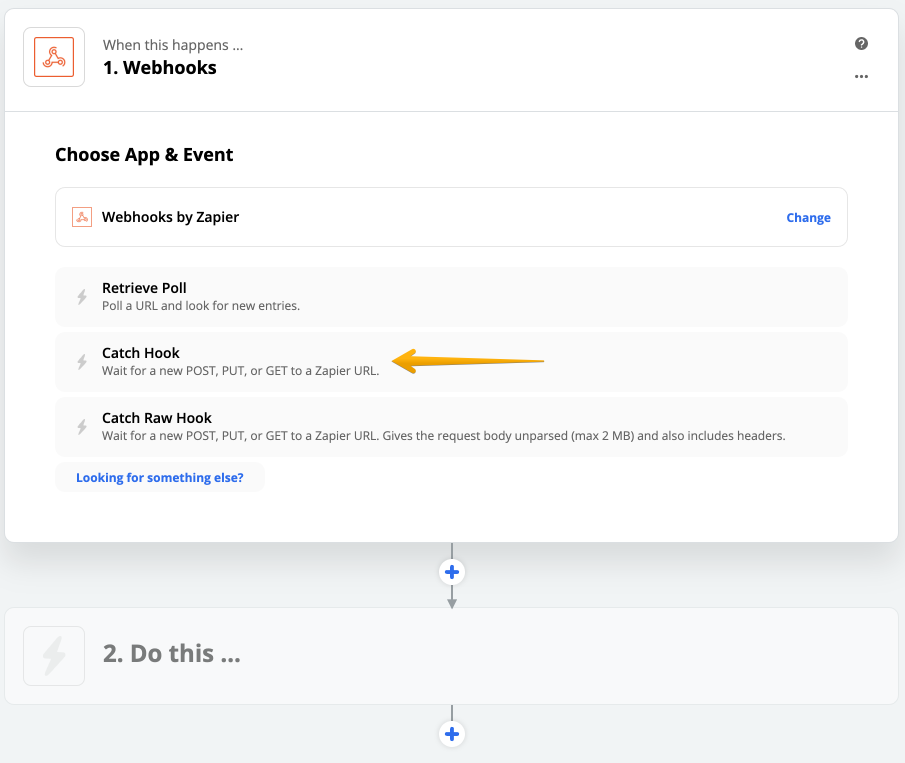
Choose “Catch Hook” as the Trigger Event and click “Continue.”
-
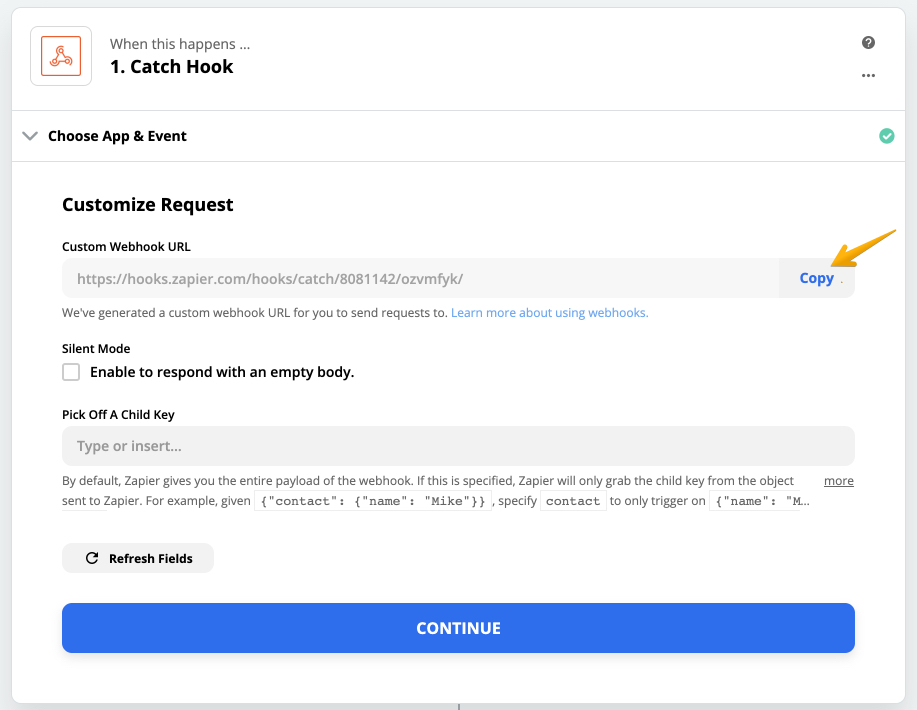
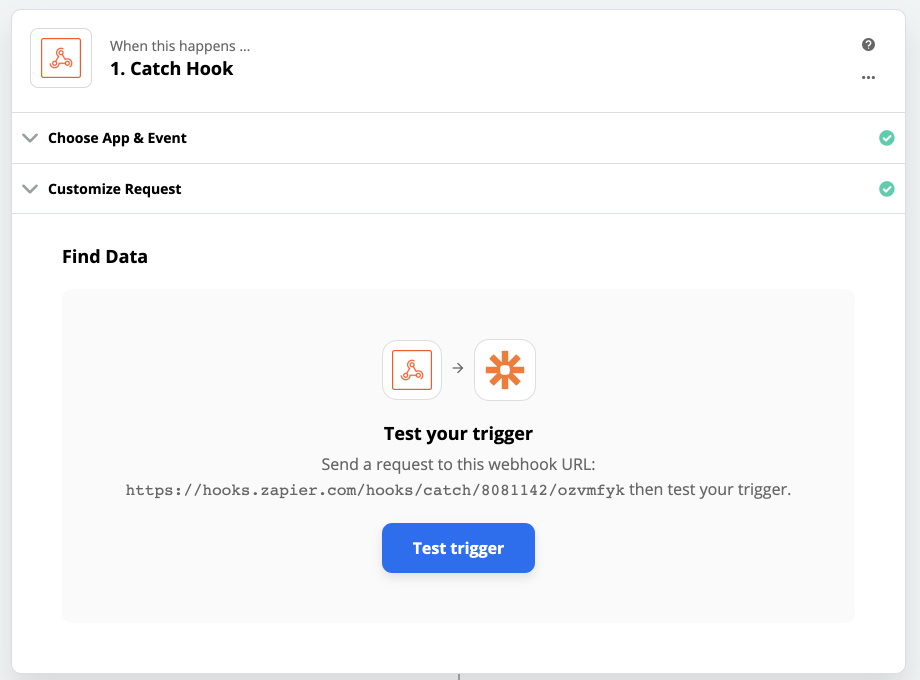
Copy the Custom Webhook URL, store it for future reference, and click “Continue.”
-
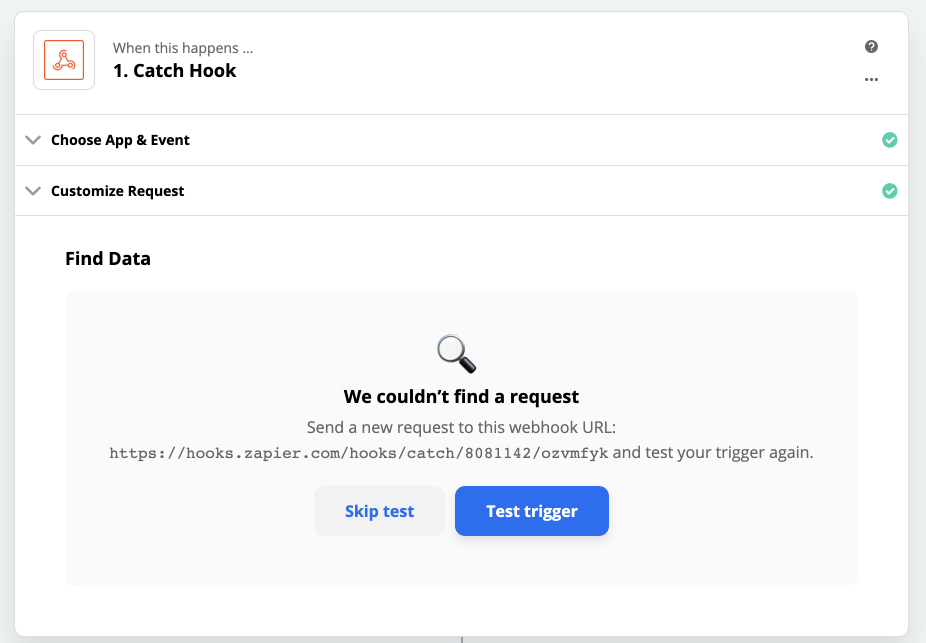
Under "Find Data," click “Test Trigger” and then “Skip Test.”
-
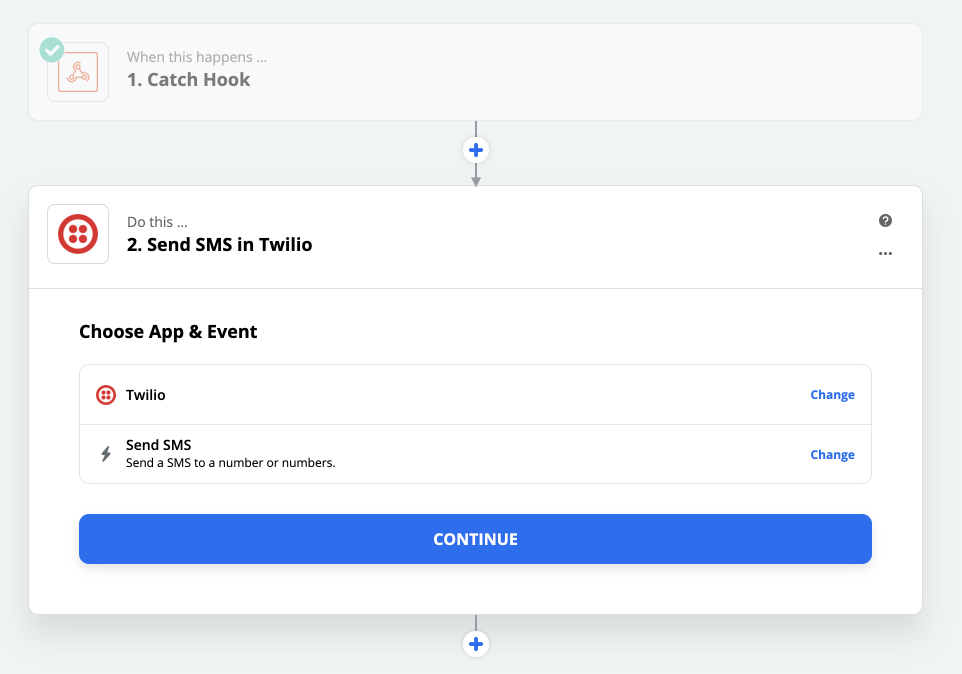
Under “Do this…” select the app that you would like to act when a Subscribe Pro webhook is caught. Proceed by logging in to your account for the selected app. (Here, we’ll be using Twilio to send an SMS text when the status of a subscription has changed.)
-
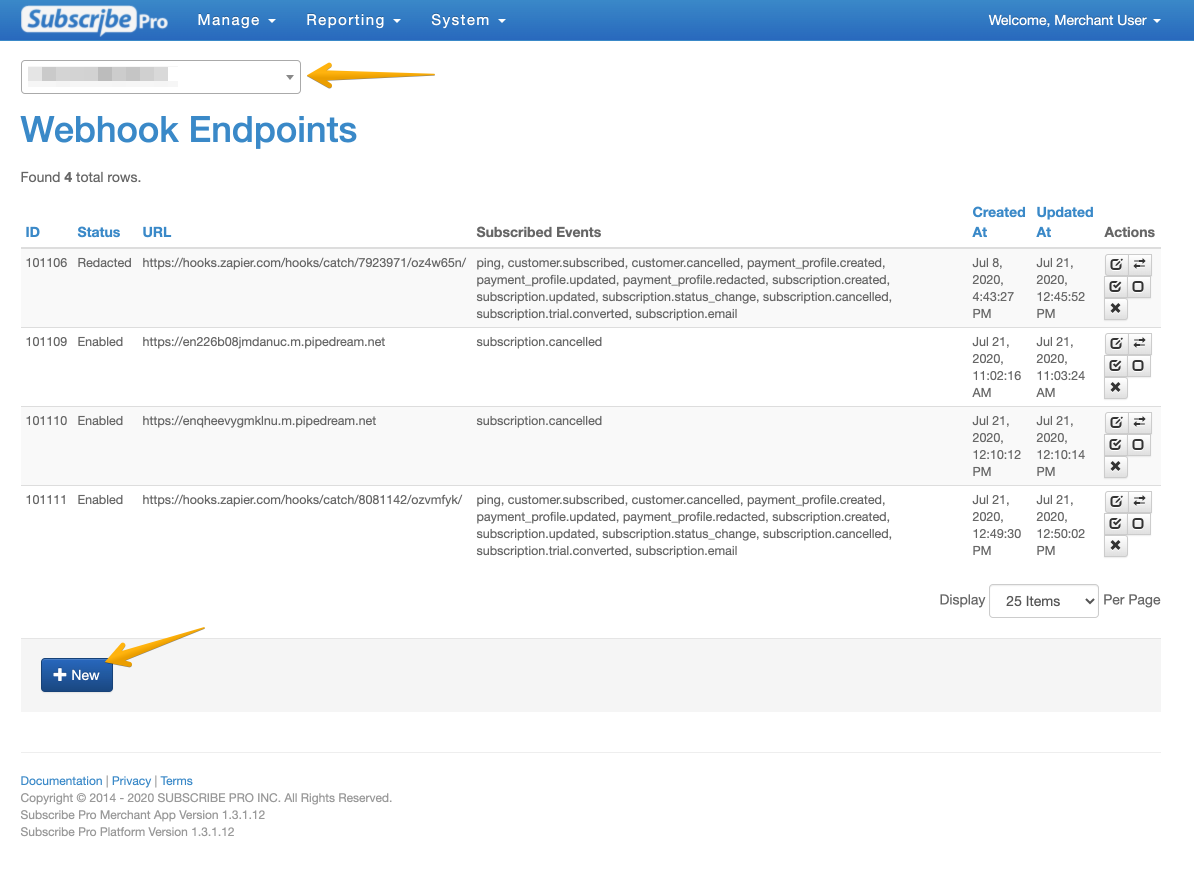
In order to retrieve sample data to test the webhook, log into Subscribe Pro, and select the environment for which you intend to use this Zap. Then, navigate to System > Webhook Endpoints and click “+New.”
-
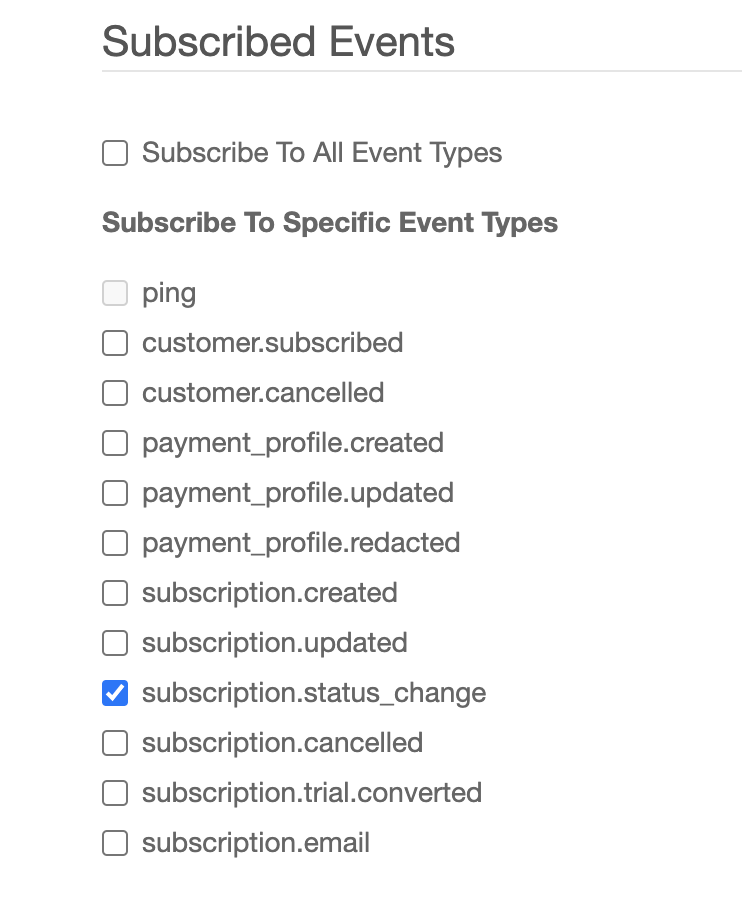
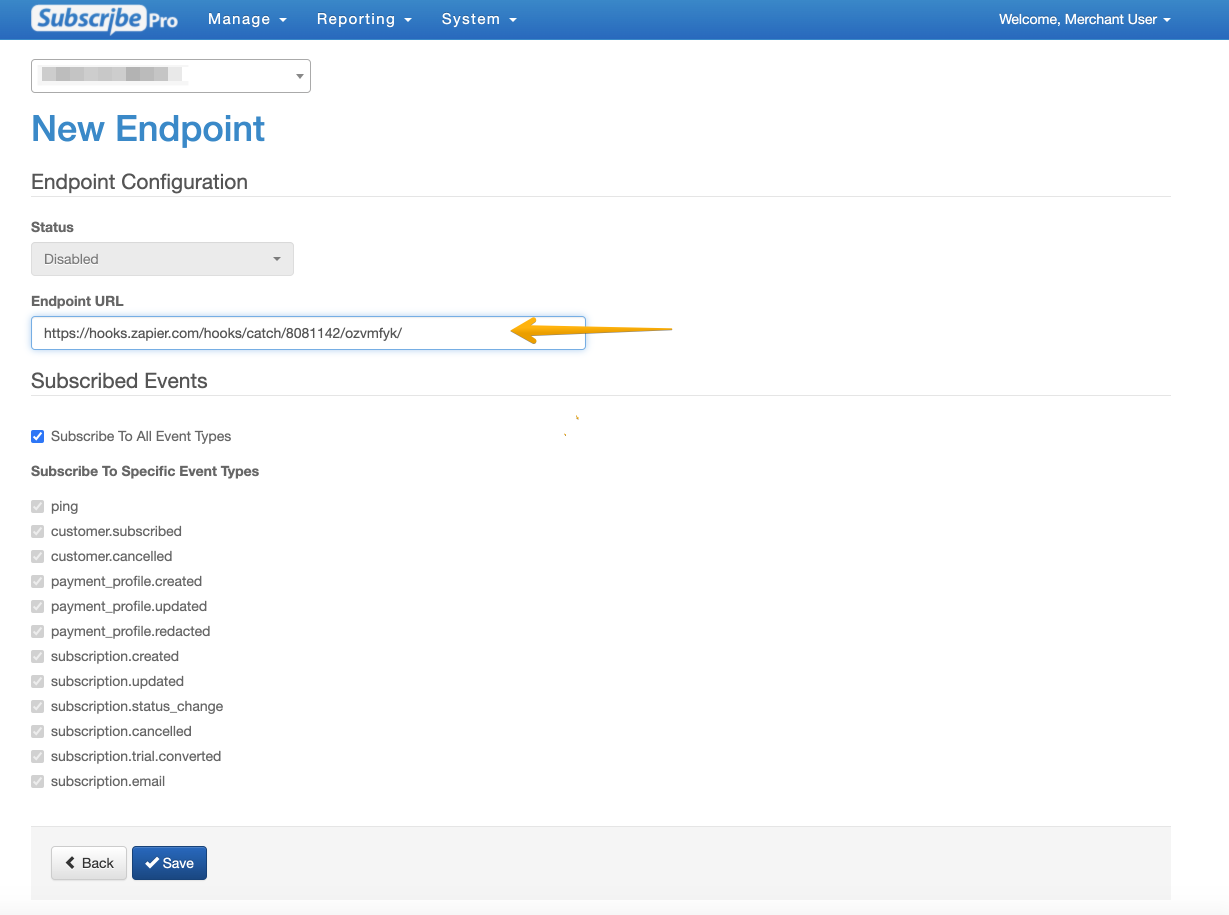
Paste the Custom Webhook URL that you copied from Zapier into the Endpoint URL field. For this example, we will only be leaving the “subscription.status_change” event checked. Feel free to select any or all events, or even create different Zaps for different events (subscription status change, cancelled subscription, etc.) for more customizable and modular notifications. When finished, click “Save.”
-
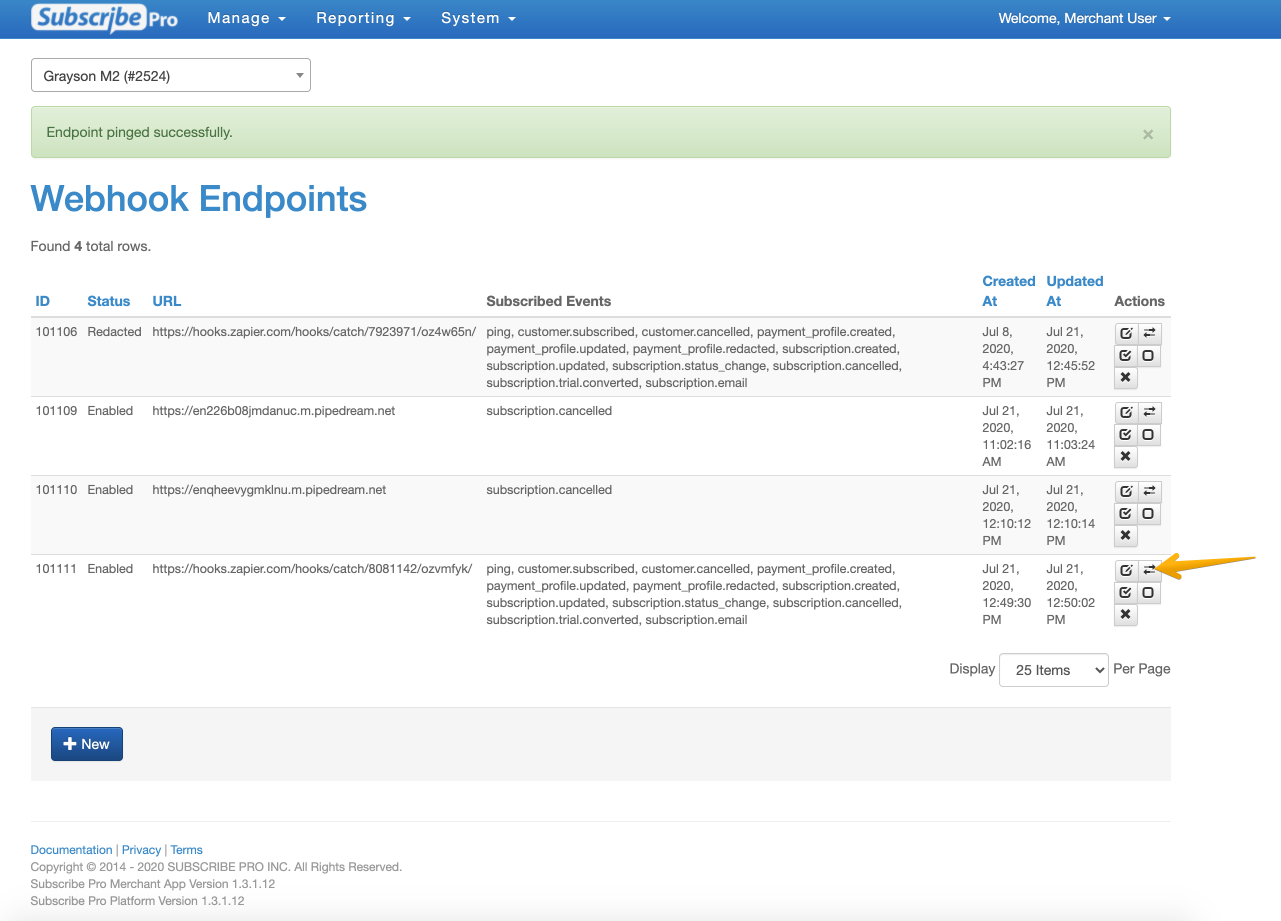
Click the “Enable” and “Test Connection - Ping Endpoint” buttons (in that order) to confirm that the URL is working properly.
-
Open a new browser tab/window and go to your store website that corresponds with the environment you selected in Subscribe Pro. Log in as a sample user (or create one now). Change something that is relevant to one of the Subscribed Events you selected. Since we’re focusing on a subscription status change for this example, we logged in as a sample user to the M2 sandbox site we selected in Subscribe Pro and paused a subscription.
-
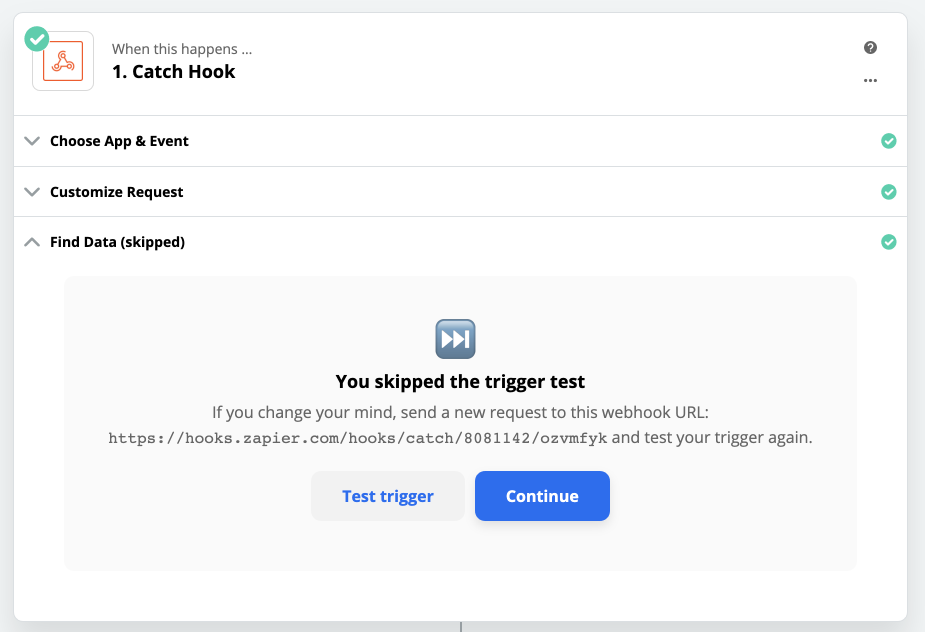
Go back to Zapier. Scroll up to Catch Hook > Find Data (skipped). Click “Test trigger.”
-
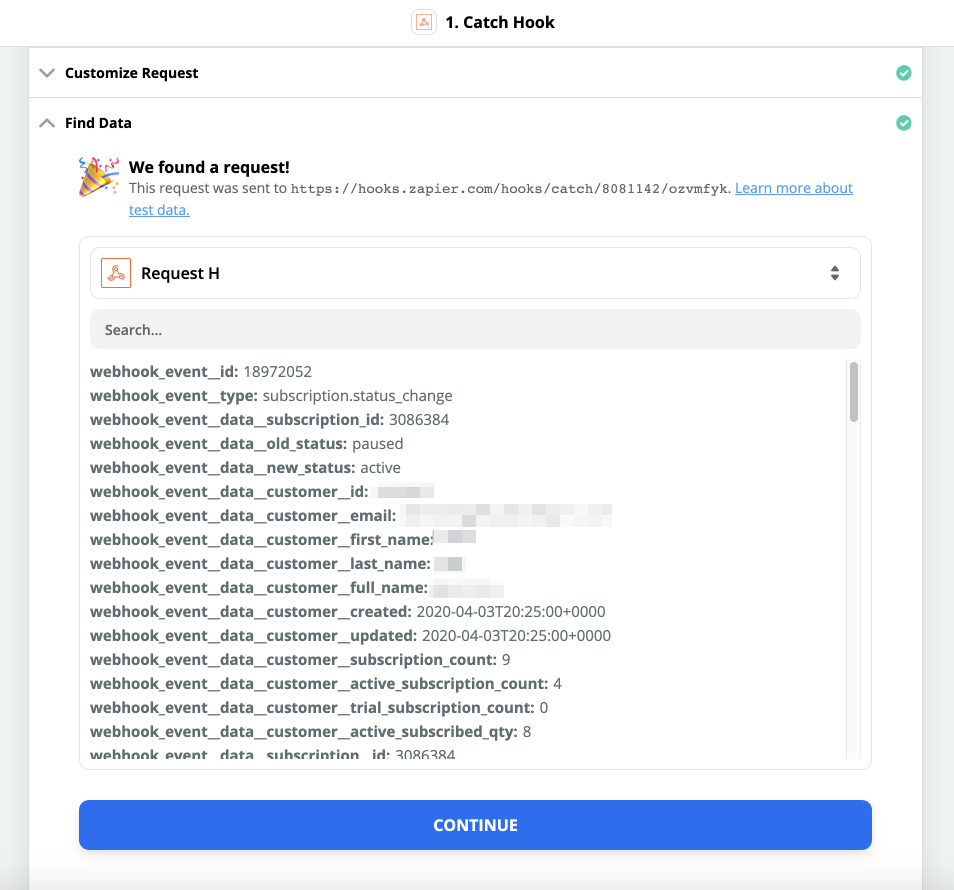
You should see all of the webhook data for the customer based on the change made in step 10:
-
Click “Continue” and scroll back down to the app you chose to use the webhook data.
-
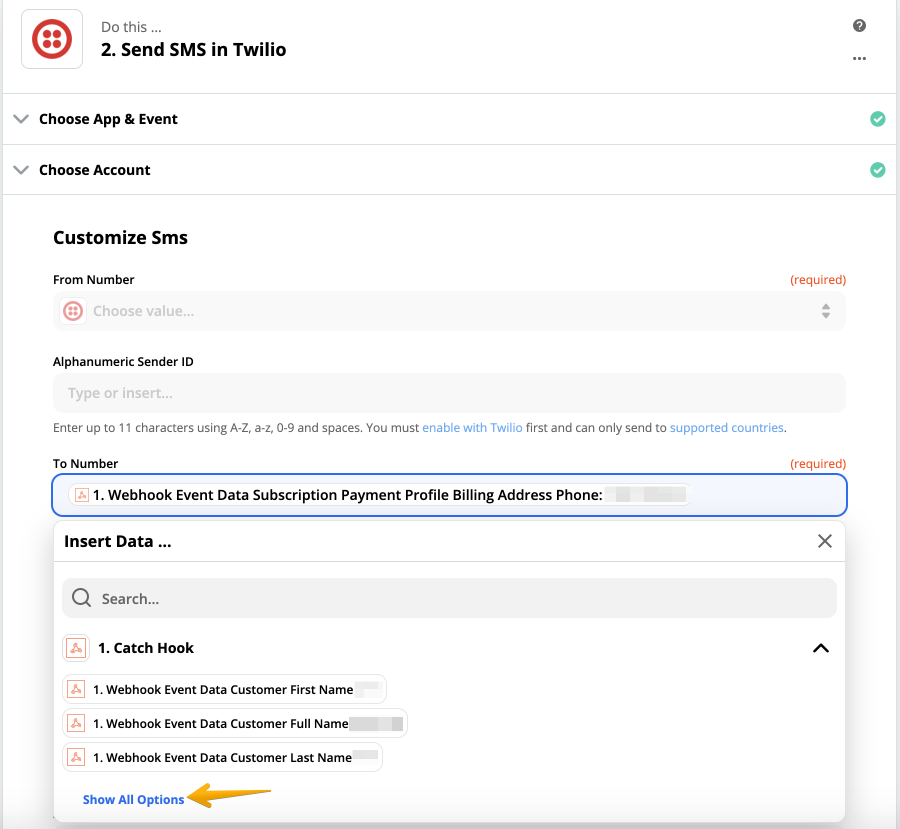
Since we are using Twilio for this example, we will need the customer’s phone number, which can be extracted from the webhook data. (You will likely need to click “Show All Options” and scroll through all the data.)
-
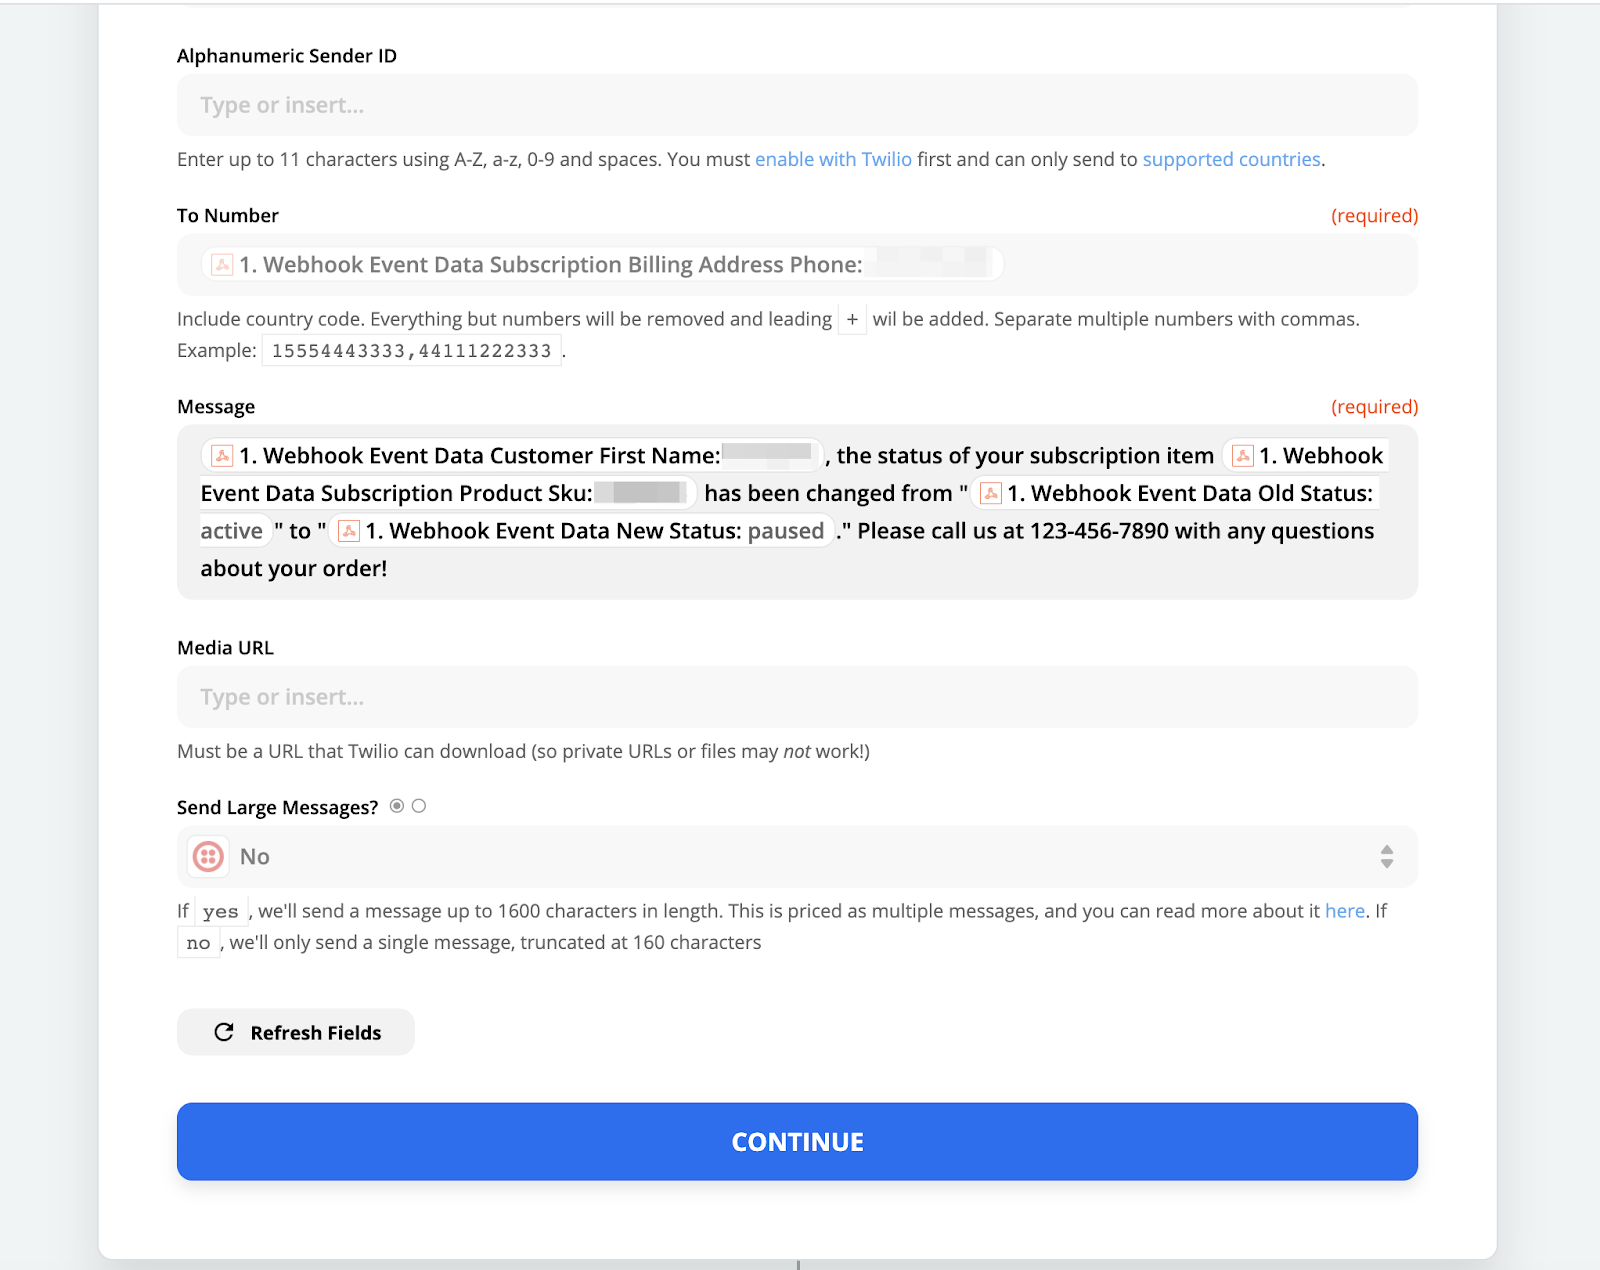
Next, we will be composing the body of our template SMS message. Click “Continue” when finished.
-
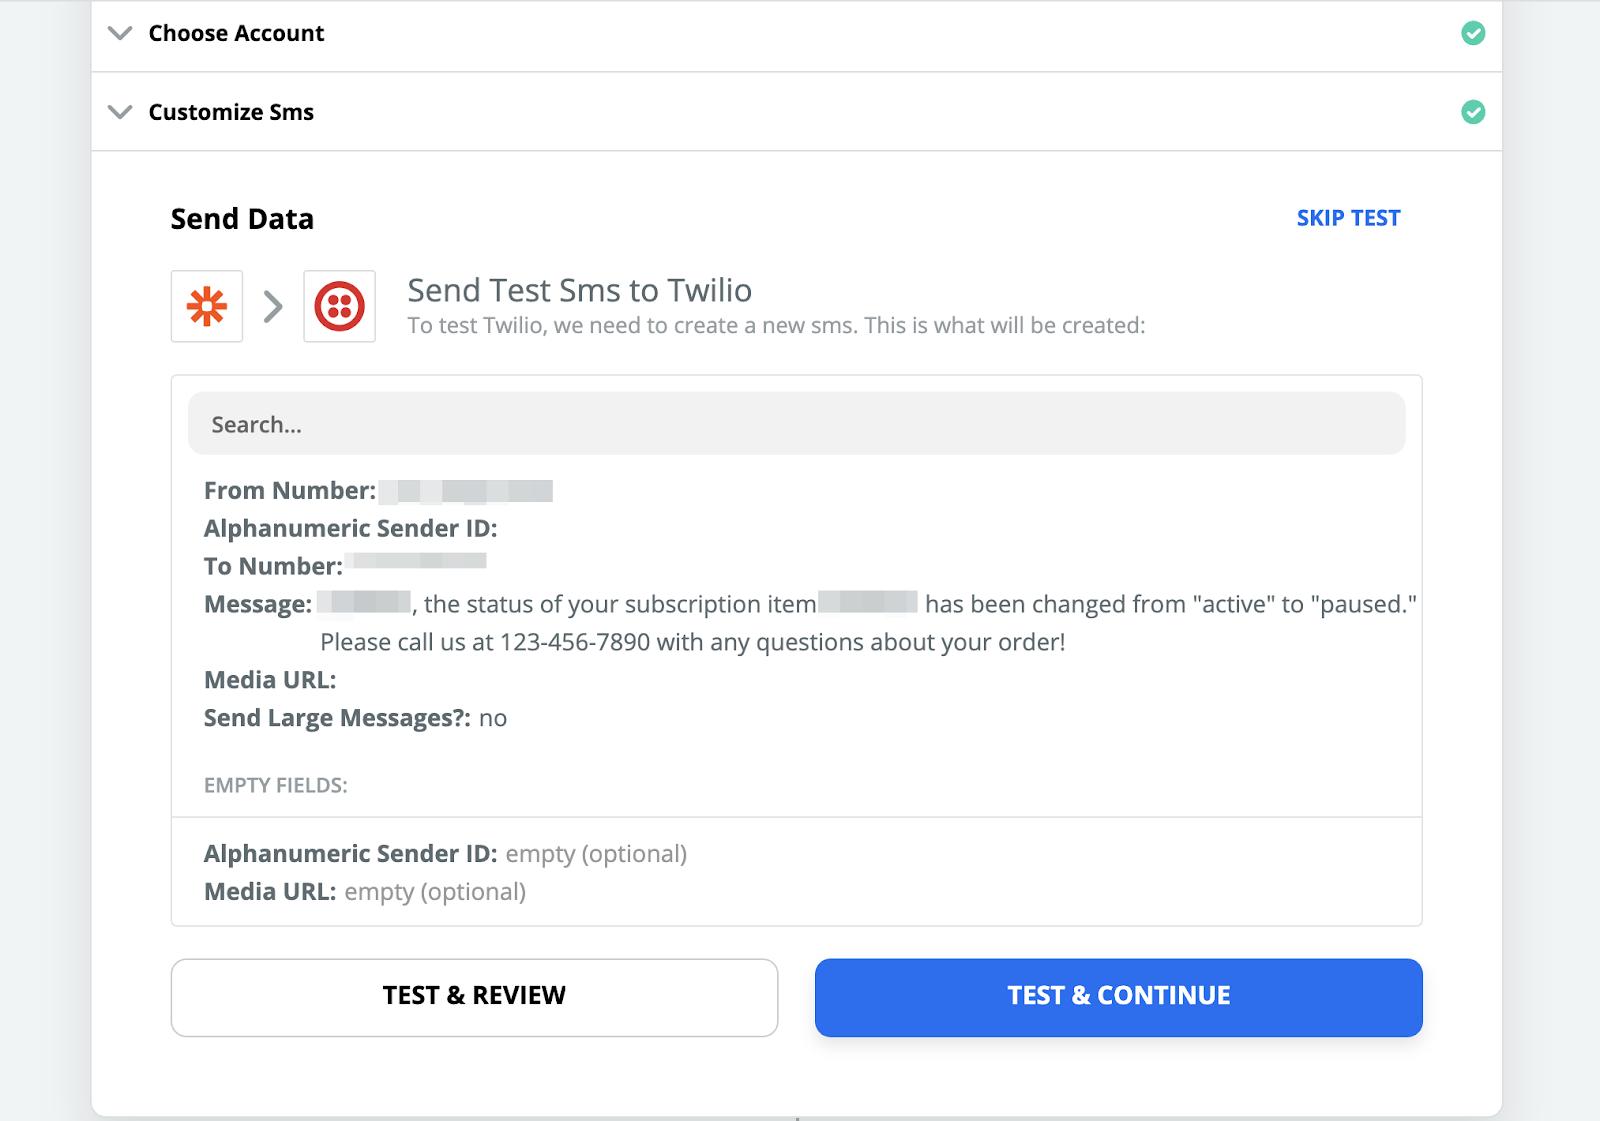
After customizing the entire SMS message, we can preview it. Click “Test & Continue” to ensure that the message goes through and appears the way you’d like it to.
-
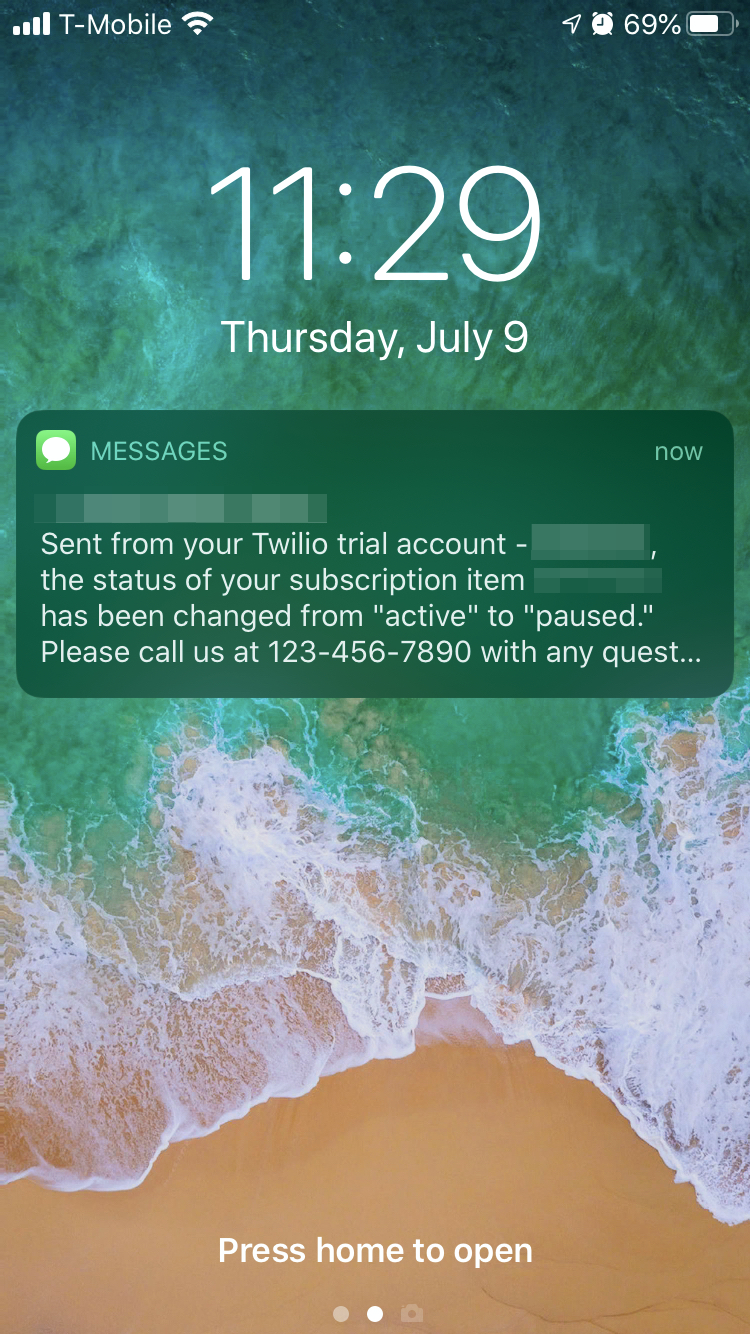
The SMS message should go through immediately (Note: Since we are only using a Twilio trial account for the purposes of this example, the message “Sent from your Twilio trial account - ” will precede all of our SMS texts.)
-
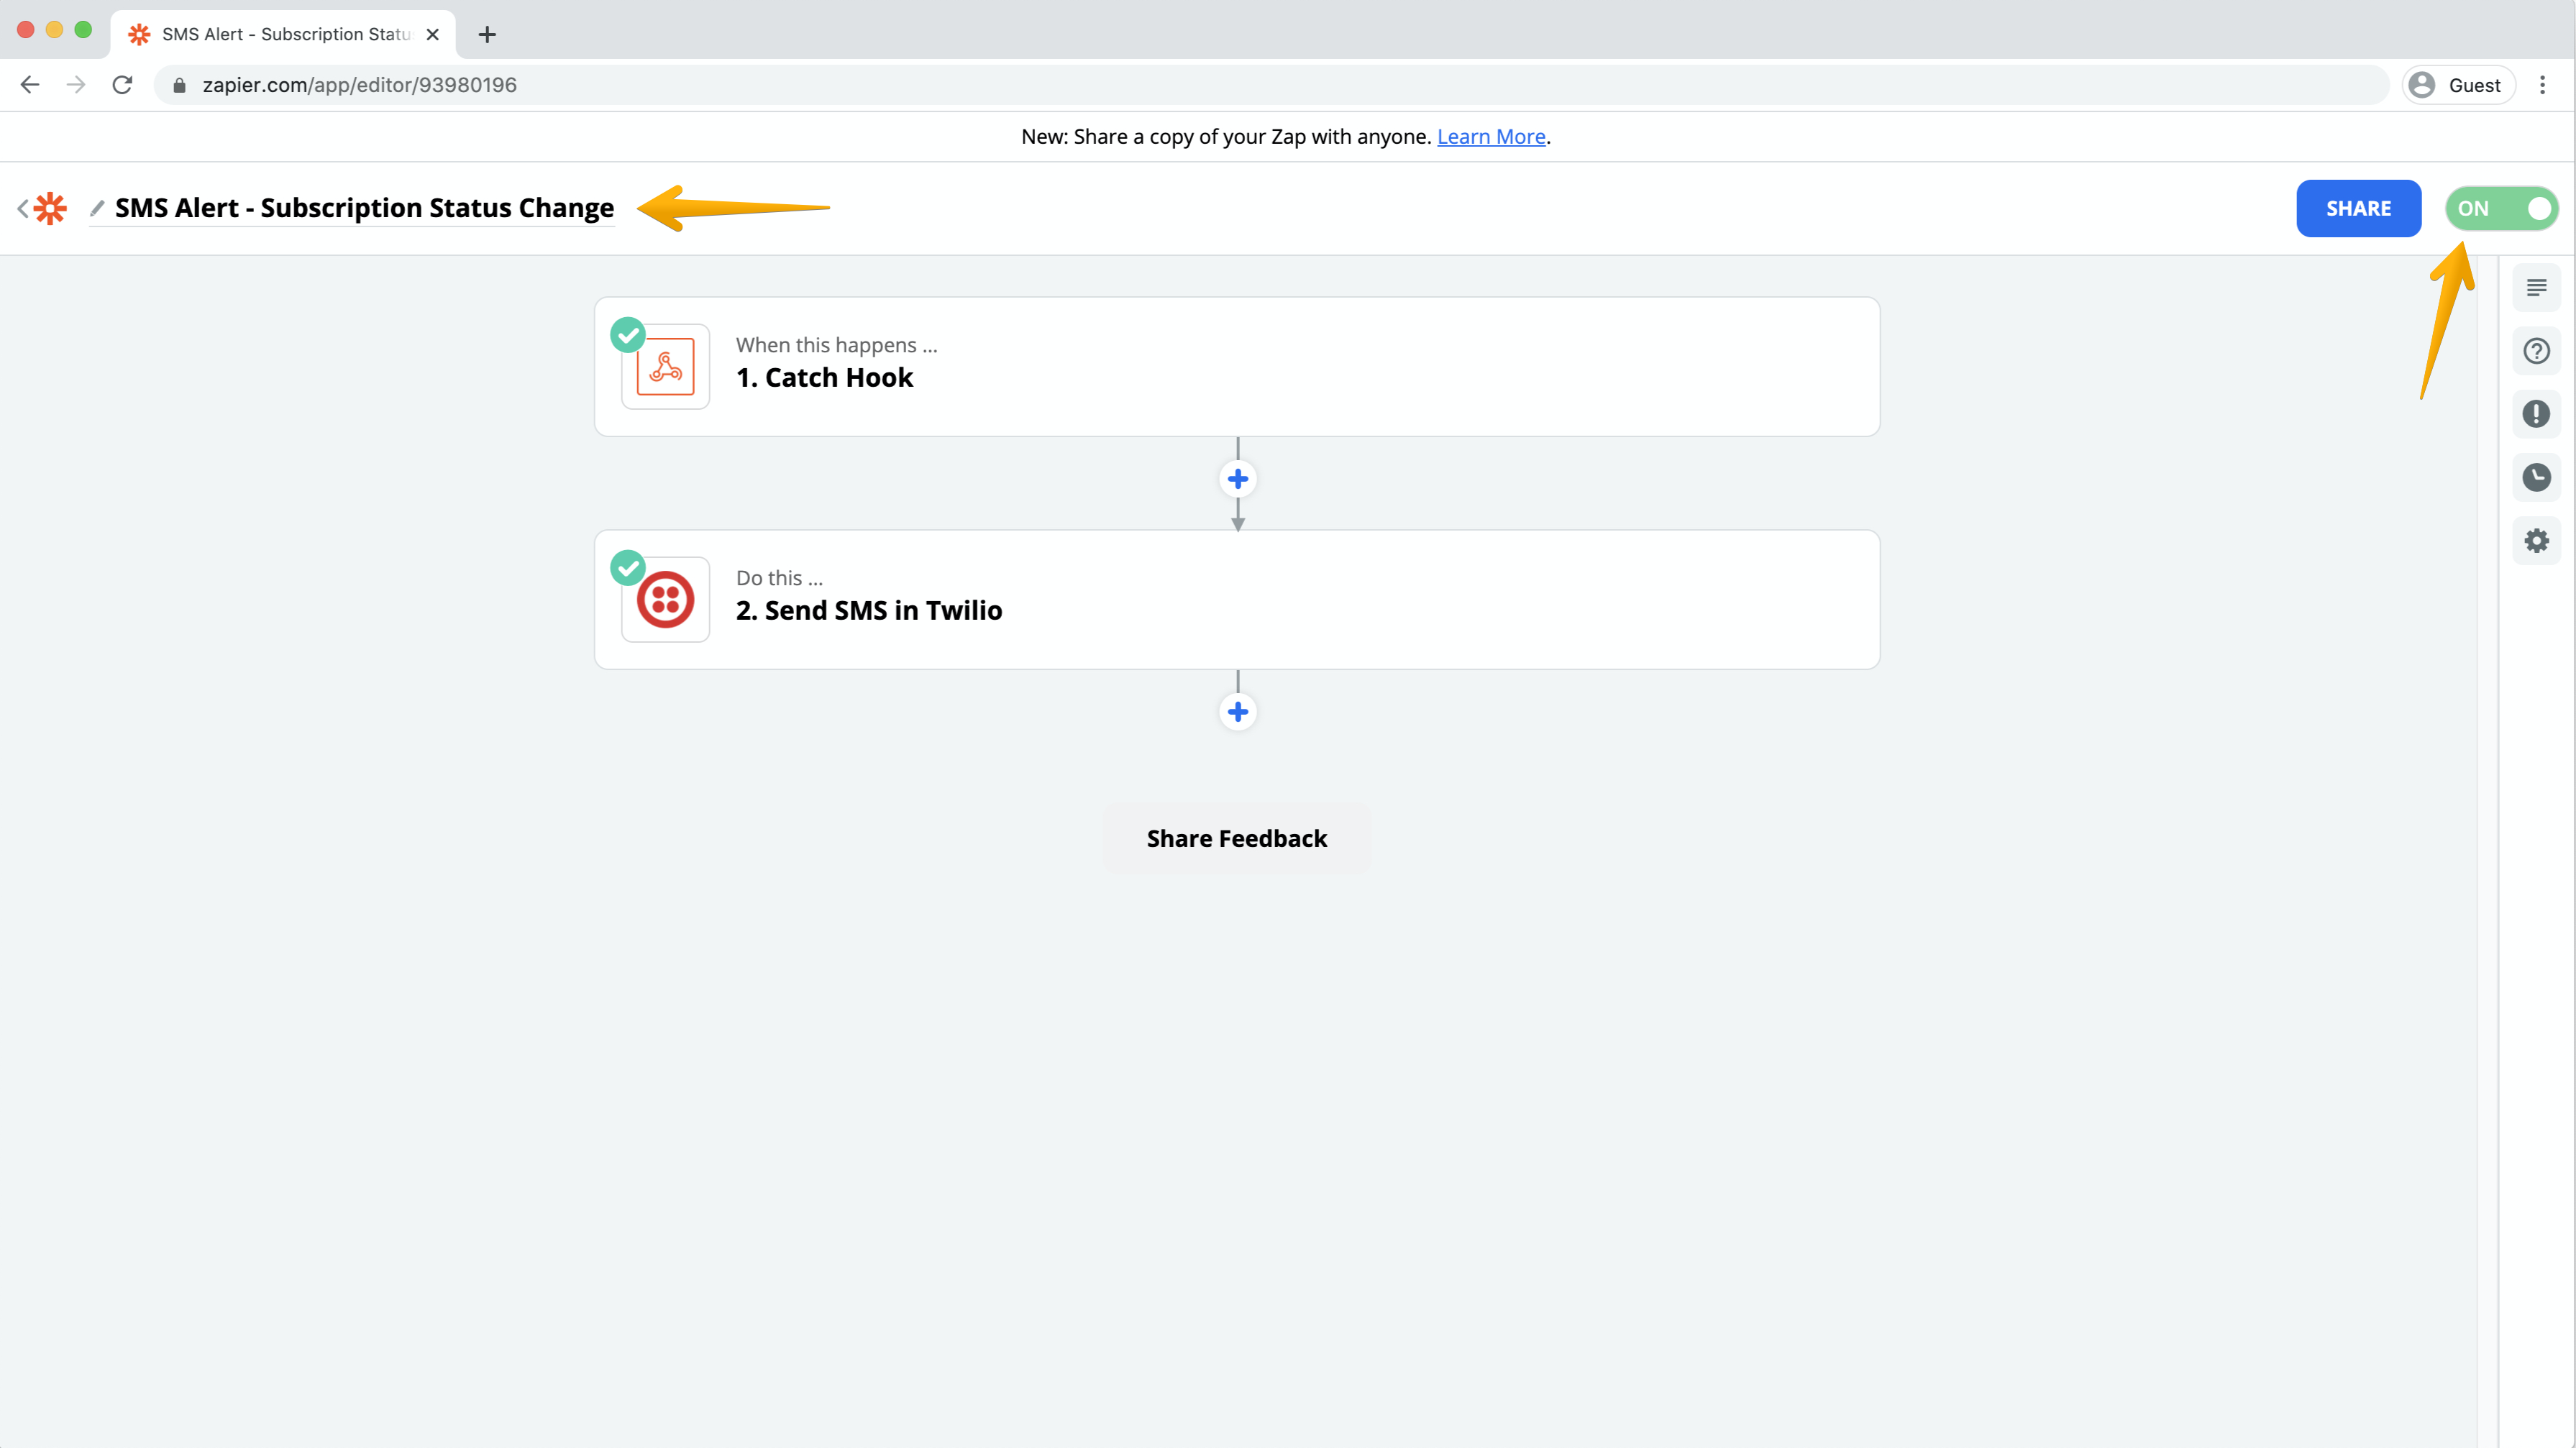
Finally, once you are content with everything, turn on the Zap and be sure to give it a name. You have successfully set up a Zap using Subscribe Pro’s webhooks.
-
(Optional) Repeat this process for any other subscription events. (In our example, we might repeat the process for a created subscription, cancelled subscription, changes to a customer’s payment profile, etc.)
